
You’ve wanted to get into running but the times you’ve tried it your joints end up aching afterwards. Or you’re winded after the first mile and wind up doubled over with stomach cramps. Or the most likely scenario: you just find it unbearably boring. I had all of these reactions when I began my running career 1000mi ago.
I made a New Year’s resolution this year to get to 1000mi of tracked runs before I turn the big 4-0. Tomorrow is my 40th birthday and I just today hit the 1000mi mark on carefully orchestrated regimen of 3mi runs.

I’ve never considered myself to be a runner (and frankly I still don’t) yet 1000mi and who knows how many millions of steps later, I have some perspective to share on what I’ve found to be effective. Running this experiment has yielded lessons not just in the act of running but also in the dashboarding and discipline required to “fly the ball” all the way down to the day. I’ll explain.
In the spirit of Tim Ferriss’ “minimum effective dose” I want to share a short summary of a few observations I’ve made throughout this journey that are the 2-3 hacks you can apply to take your running to the next level. Here are the core lessons I’ve had over this journey:
- Minimalist running: I wrote about it on Quora here a few years back when I adopted this style with switching to the Vibram shoes (the funny “gloves for your feet”). This has yielded the single greatest benefit to my running by making the runs interesting. For the reasons I wrote about back in 2011, going minimalist brings you more into the present and gives you greater connection to the ground. As hippie-sounding as that is, it just makes the runs more interesting and therefore increases your odds of sticking with them. The other thing it does is forces you to adopt…
- Forefront-strike running: which is related but not the same thing. This is a style of running where you land on the pads of your feet. Here is a great video for teaching you how to adapt your form if you run like most people with a heel-strike. The mental visualization that worked for me once I transitioned to this style was thinking about leaning forward like I was on a Segway scooter pawing the ground to constantly catch myself in a controlled forward fall. This eventually becomes less awkward and starts to feel totally normal. You might look a little weird at first but when your joint pain evaporates from running this way, you won’t care how you look. Also, be advised you’ll be exercising a subtly different set of muscles- be prepared to have calf muscle aches and potentially Achilles heel tension when you switch to this style. In my case these aches disappeared after the first 3wks.
- Lactic (or Lactate) Threshold running: This was something I adopted at roughly the same time I switched to the forefront strike style. You can read more about it here but here is the crux: people who run and get winded are burning glycogen stores. You can slow your pace initially and train at a level where you don’t get winded and build your stamina, gradually increasing your speed over time to the point where you’re running as fast as those folks who burn glycogen, only you’re burning fat stores and not getting winded. If I didn’t experience this I would call BS but it’s real. It’s like becoming a hybrid car and switching over to running on electric. You can run for ridiculous distances continuously without getting winded and it has the bonus of melting away bodyfat. I don’t proclaim to know all the science behind this but I can vouch that it absolutely works. Some people use sophisticated heart monitors to determine their lactate threshold- I just trained until I knew where my “getting winded” point is and would back off until I wasn’t hitting it. At this point I run 8:30min/mi without getting winded. When I started I ran at the embarrassingly-slow 13min/mi pace. It doesn’t matter where you start- just slowly up your pace to push your limits and then back off until you don’t get winded.
- Training at altitude: makes you like Superman when you return to sea level. There’s a reason athletes spend gobs of money on these hyperbaric chambers. They simulate high altitude conditions for training and then sleep at sea level conditions. This basically changes your blood chemistry because your body habituates to operating with depleted oxygen levels so your red blood cells go Chuck Norris and over compensate. I can confirm this definitely has a noticeable effect. I spent two summers living and running up in Flagstaff, AZ (7,000 ft). When I visited a buddy in Santa Monica it was like I was running on the sideways escalator at the airport just cruising at sea level. It was as if the ground gave less resistance. I doubled my normal distance and could have kept going with no issues.
These are the main epiphanies and leverage points IMO that you can take advantage of to ratchet up your running performance. One thing I would NOT recommend is going completely barefoot. I tested the limits of how far to take the minimalist running by doing a run with no shoes at all about a month ago and wound up with a plantar’s wart the size of a quarter on my left heel.
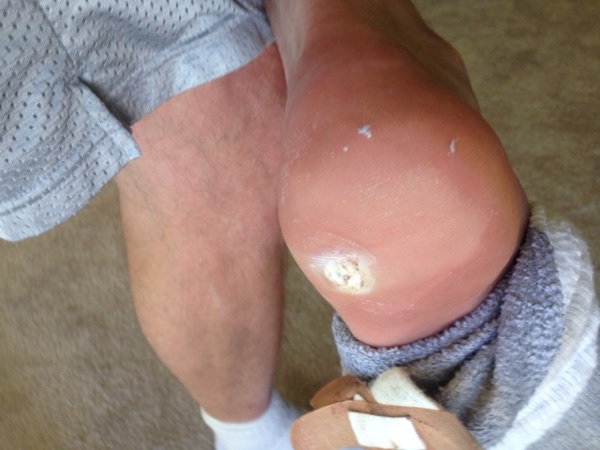
This was a month ago with still 30mi left to run in the challenge. When it happened I was sure given how painful it was that it almost certainly spelt the premature death the whole effort but thankfully, because I had adopted the forefront style, it actually hurt less to run than it did to walk. I was able to run the remaining 30mi without issue and the wart is now nearly gone after getting the nitrogen treatments. I learned that these things come from skin contact with the HPV virus so I would encourage others considering the full-barefoot approach to think twice and wear at least some form of minimal footwear. And use flip flops in any kind of gym shower environment.
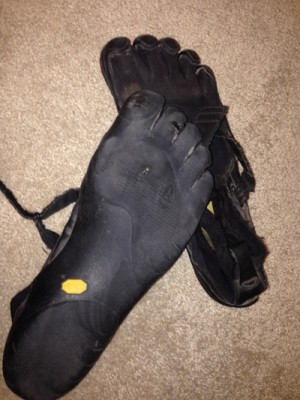 My friend Bryan uses the Luna Sandals and swears by them. I’ve still got my one very worn-out pair of Vibrams that I’ve been using since 2011.
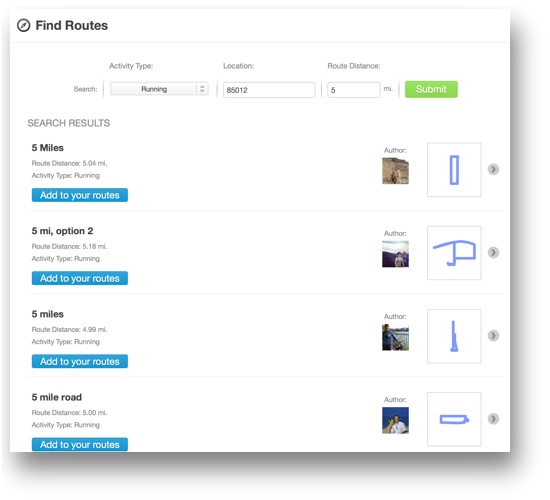
Anyways, these have been my main observations. I used the RunKeeper free account to track my runs. A nifty feature of that app is the social discovery aspect when you go to a new locale, it allows people to upload their favorite runs so you can show up in a new area and see the ones that are most popular. Very useful if you travel a lot. Let me know if you have any questions and good luck in your pursuit of running. It’s been a great way for me to stay in shape while also forcing mandatory zen out time to clear my head and chew on problems without the distraction of a computer screen. If I can help you get into running let me know what obstacles you’re grappling with and I’ll happily share any wisdom I can.
This is a screenshot of the social discovery aspect in RunKeeper FWIW:
PS. We just today opened up the Grid7 Academy where we’ll be teaching startups and entrepreneurs everything we do for clients. Sales & Marketing Automation, Customer Development, Lifecycle Marketing, Leadgen… be one of the first to enroll here.

 Let me explain. I just returned from spending the last ten days at SXSW Interactive and Music. The attendance for Interactive was just shy of 20,000 people and Music this year was apparently about 10x that number. Having attended SXSW three years back the best analogy I can give is that this star of an event has super-nova’d into a Red Giant that’s borderline overwhelming. With such an intense amount of condensed human interaction it’s like trying to drink off of a fire hydrant: you better have a formalized system for taking baby sips or you risk getting your head blown off by the stream. So here’s the three-part “GTD-like” system I used to extract meaning from this event:
 At SXSW you’ll meet no less than 20 interesting people each day. These will be folks from all over the world with shared interests and with whom (if you had hours to sit and chat) you would almost certainly find incredible commonalities and opportunities to help each other via sharing contacts/advice/experiences. Sadly you have only limited surface area at an event like this though so you have a tiny window of interaction to make a meaningful connection.
 BTW I hate paper- it’s something extra that takes up space and inevitably you end up losing it. And yet in spite of all our ability to put a man on the moon we still rely upon paper as the lowest common denominator for exchanging contact info at conferences. Go figure.


 The two most effective traffic generation activities for me were making physical signs to get foot traffic and doing the Craigslist ads. For signs I recommend the big bright cardstock at an office supply store, a fat magic marker and taping it to a box that you anchor with rocks. Figure out the closest main traffic arteries and place the signs strategically so they’re visible from both directions and so there’s a sign of the same color visible at every turn until they get there. Start early (6am) – you’d be surprised how many people are up at that hour and looking for yard sales (the majority of my foot traffic came before 10am). There’s seemingly a whole culture of people who drive around looking for these signs and scavenging at yard sales. And that leads to the next point:


